This article is a 'how-to' for installing Oracle's Java JDK 8 (or SE 8) and Google's Android Studio on a 64-bit Windows 8.1. If you wish to develop software on the Android platform on your Windows PC, then this 'how-to' is for you.
On a newly-installed and updated Windows 8.1 PC, there is no Java installed by default. This can be verified by opening a terminal by right-clicking on the 'start' button and selecting the 'Command Prompt'. Then execute the following command:
java -version
If you see a response similar to the figure below, then you can be sure that there is no Java installed.
You can then proceed to install it by pointing your web browser to here and clicking on the 'Download' button as indicated by the red arrow in the figure below.

On the next page that appears, click on 'Accept License Agreement' (item1 in the figure below), followed by a click on the Windows x64 Java download file (item 2) and lastly, a click on the Windows x64 Demos and Samples download file (item 3). Just remember to save the files - they will go into the Downloads folder by default. Strictly speaking, the last item is not necessary for Android program development but is recommended if you are new to Java and wish to play around with demos and samples provided by Oracle.
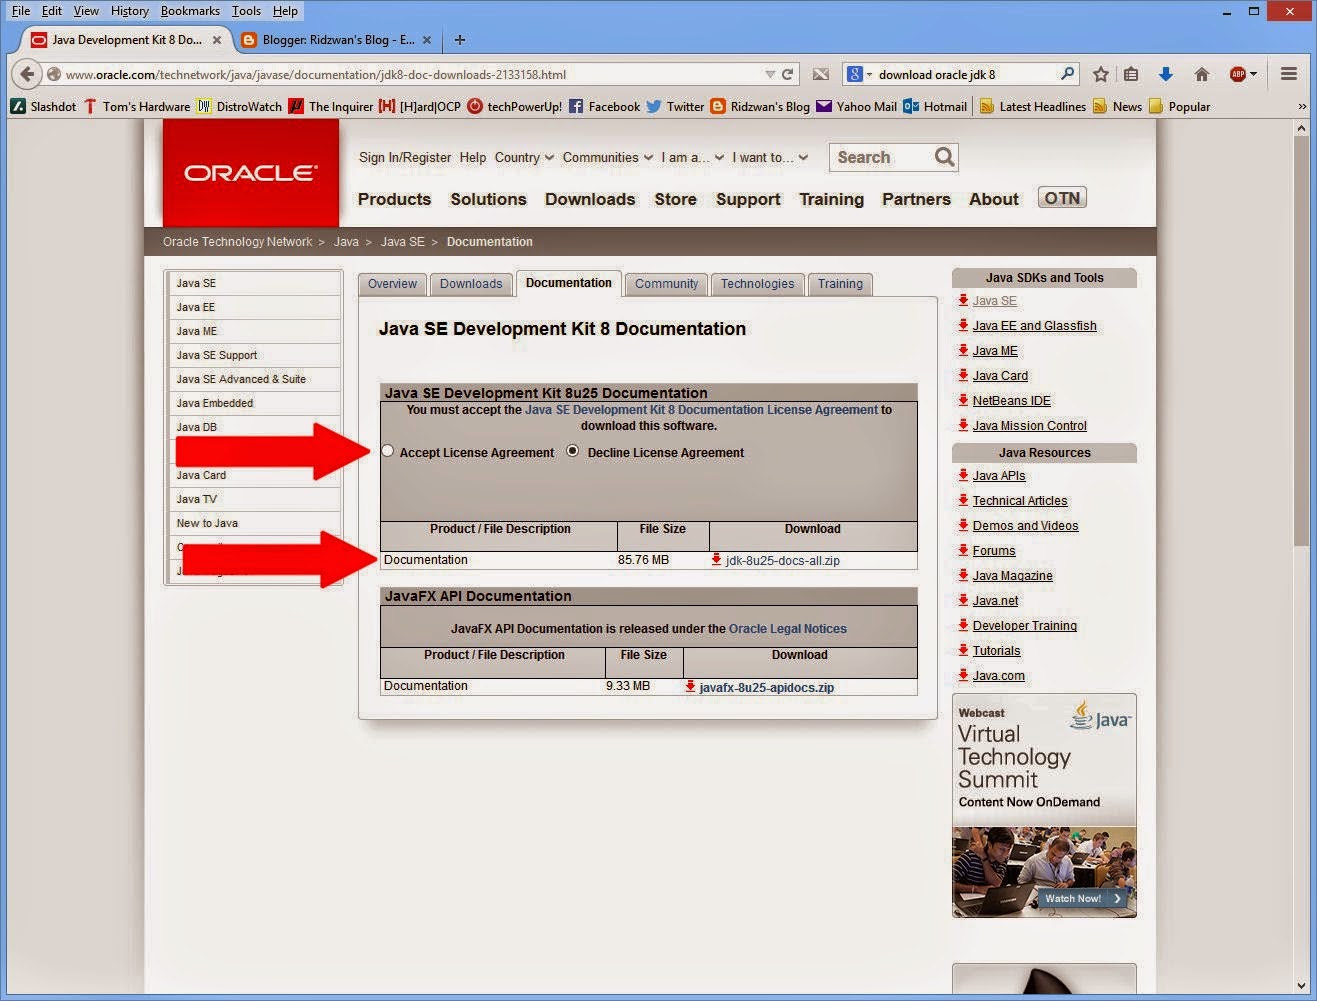
Now click the 'Back' button on your web browser and then click on the Java SE 8 Documentation 'Download' button (you may have to scroll down a bit to see this item) to download the API documents for Java. Again this item is not necessary for Android program development but is highly recommended if you are a heavy Java programmer.
On the next page that appears, click on 'Accept License Agreement', followed by a click on the docs download file and then save it.
If you take a look in the Downloads folder, you should see the following 3 files (if you have downloaded all 3):
jdk-8u25-windows-x64.exe
jdk-8u25-windows-x64-demos.zip
jdk-8u25-docs-all.zip
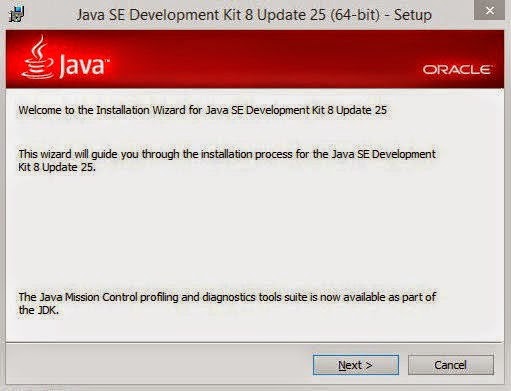
To install the Java JDK 8, double-click on the 'jdk-8u25-windows-x64.exe' file. If the User Account Control pops up, click on the 'Yes' button. The Installation Wizard (shown below) will appear.
From here, follow the on-screen instructions in order to install Java - keep clicking on the 'Next' button when they appear, until you come to the last screen where you can click on the 'Close' button. Oracle Java is now installed on you PC. To verify, start a Command Prompt and execute 'java -version' again. This time you will see a screen similar to the one shown below.
One more thing before going any further and that is to first set the JAVA_HOME environment variable and to set the PATH environment to include the 'bin' directory of where Java was installed on your system. If you have not changed it this would be 'C:\Program Files\Java\jdk1.8.0_25'. To do this, right-click on the 'This PC' icon on your desktop and select 'Properties'. On the next screen that appears, click on the 'Advanced system settings' item. On the 'System Properties' window that appears (see figure below), click on the 'Environment Variables' button.
The 'Environment Variables' window will appear (see figure below). Click on the 'New...' button.
The 'New System Variable' window will appear (see figure below). Enter 'JAVA_HOME' as the variable name and 'C:\Program Files\Java\jdk1.8.0_25' as the variable value as shown in the figure. Then click the 'OK' button.
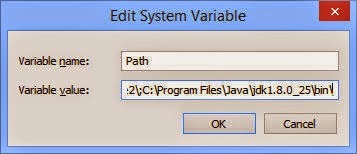
Scroll down the 'System variables' window until you see the 'Path' item, then click on it. Then click on the 'Edit...' button. The 'Edit System Variable' window will appear (see figure below).
Click anywhere in the 'Variable value' field and then press the End key on your PC. Then type the following into the field:
;C:\Program Files\Java\jdk1.8.0_25\bin\
Do not forget the semi-colon at the start - they are used to separate each path item from one another. The completed screen will look something like this:
Click 'OK', followed by another 'OK', and finally another 'OK'. Close the Control Panel window. To make the new environment variables effective, log out from the system, then log in again. Open a Command Prompt and type the following commands, one by one:
echo %JAVA_HOME%
echo %PATH%
You should see something similar to the screen below.
Strictly speaking, this settings is not necessary for Android program development but is recommended if you are new to Java and wish to learn Java programming which is a requirement for Android program development. The JAVA_HOME and PATH settings will help the new Java programmer to execute the 'javac' (the Java compiler) from anywhere in the system.
If you have downloaded the demos (and samples) and docs, now would be a good time to install them. First unzip the demos to a temporary directory - this will create a 'jdk 1.8.0_25' sub-directory in which there will be two more sub-directories - 'demo' and 'sample'. Then unzip the 'docs' file to the same 'jdk 1.8.0_25' sub-directory just created. This will create another sub-directory called 'docs'. Then move all these 3 sub-directories ('demo', 'docs' and 'samples') to the actual Java directory, i.e., 'C:\Program Files\Java\jdk1.8.0_25'. You will have to give permission for this action since you are moving files into a 'system' type directory.
Now it's time to download and install Google's Android Studio. Point your web browser to here and click on the big green button to start the download.
Then check the terms and conditions item and then click the download button. Save the file and wait for the download to finish.
Double-click on the downloaded file to install it - if UAC asks for permission, click on 'Yes'. The setup screen (see figure below) will appear - click on the 'Next' button.
Click on the 'Next' button when the next screen (shown below) appears.
The next screen (shown below) is the license agreement. If you agree to it, click on the 'I Agree' button.
The next screen (shown below) is the configuration settings where all the installation paths are shown. Change it if you wish and click the 'Next' button to proceed.
The next screen (shown below) is another configuration setting for the accelerated emulator mode using HAXM and for size of the emulator memory. The recommended size is already specified, so just click on the 'Next' button.
The next screen is for the creation of a start menu folder - leave it at the default and click on the 'Install' button. The actual installation of Android Studio will begin - wait for the installation to finish and the screen shown below will appear. Click on the 'Next' button.
The last screen (shown below) will be displayed with the 'Start Android Studio' checked. Click the 'Finish' button to close the setup window and start Android Studio.
The first screen (shown below) asks whether you want to import any settings. If this is the first time you installed and started Android Studio, chances are that you don't have any - so just click on the 'OK' button.

Android Studio will begin loading as shown in the figure below.
When it has finished loading, it will check for an Internet connection and then start to download the Android SDK Tools (see figure below).
When it has finished downloading and installing all components, a low window will appear (see figure below). Check this window for errors - if there are none, then click on the 'Finish' button. If there are errors, the log window will give details on the errors - you need to fix them before trying to use Android Studio for Android program development.
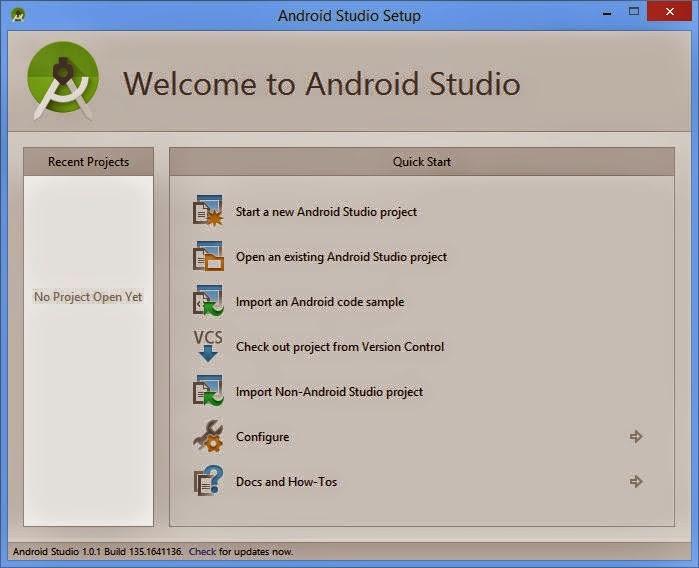
The main Android Studio IDE will then appear (see figure below). Notice that at the bottom of the windows is a message 'Check for updates now' - click on the 'Check' term to start the check.
If there are any updates, a window similar to the one below, will appear. Click on the 'Update and Restart' to start the update process and to restart Android Studio.
Once the updating process has finish, Android Studio will restart and you will be back to the IDE.
Congratulations! You have now sucessfully installed Android Studio on your Windows 8.1 PC. Where to go from here? You must know that Android Studio is relatively new (Google was using the Eclipse IDE previously) so the number of good tutorials on the web is somewhat limited. However, a quick search on Google revealed some good sites - I recommend that you visit some of the sites and see whether they meet your needs.
Happy computing!
On a newly-installed and updated Windows 8.1 PC, there is no Java installed by default. This can be verified by opening a terminal by right-clicking on the 'start' button and selecting the 'Command Prompt'. Then execute the following command:
java -version
If you see a response similar to the figure below, then you can be sure that there is no Java installed.

On the next page that appears, click on 'Accept License Agreement' (item1 in the figure below), followed by a click on the Windows x64 Java download file (item 2) and lastly, a click on the Windows x64 Demos and Samples download file (item 3). Just remember to save the files - they will go into the Downloads folder by default. Strictly speaking, the last item is not necessary for Android program development but is recommended if you are new to Java and wish to play around with demos and samples provided by Oracle.
Now click the 'Back' button on your web browser and then click on the Java SE 8 Documentation 'Download' button (you may have to scroll down a bit to see this item) to download the API documents for Java. Again this item is not necessary for Android program development but is highly recommended if you are a heavy Java programmer.
On the next page that appears, click on 'Accept License Agreement', followed by a click on the docs download file and then save it.
If you take a look in the Downloads folder, you should see the following 3 files (if you have downloaded all 3):
jdk-8u25-windows-x64.exe
jdk-8u25-windows-x64-demos.zip
jdk-8u25-docs-all.zip
To install the Java JDK 8, double-click on the 'jdk-8u25-windows-x64.exe' file. If the User Account Control pops up, click on the 'Yes' button. The Installation Wizard (shown below) will appear.
From here, follow the on-screen instructions in order to install Java - keep clicking on the 'Next' button when they appear, until you come to the last screen where you can click on the 'Close' button. Oracle Java is now installed on you PC. To verify, start a Command Prompt and execute 'java -version' again. This time you will see a screen similar to the one shown below.
One more thing before going any further and that is to first set the JAVA_HOME environment variable and to set the PATH environment to include the 'bin' directory of where Java was installed on your system. If you have not changed it this would be 'C:\Program Files\Java\jdk1.8.0_25'. To do this, right-click on the 'This PC' icon on your desktop and select 'Properties'. On the next screen that appears, click on the 'Advanced system settings' item. On the 'System Properties' window that appears (see figure below), click on the 'Environment Variables' button.
The 'Environment Variables' window will appear (see figure below). Click on the 'New...' button.
The 'New System Variable' window will appear (see figure below). Enter 'JAVA_HOME' as the variable name and 'C:\Program Files\Java\jdk1.8.0_25' as the variable value as shown in the figure. Then click the 'OK' button.
Scroll down the 'System variables' window until you see the 'Path' item, then click on it. Then click on the 'Edit...' button. The 'Edit System Variable' window will appear (see figure below).
Click anywhere in the 'Variable value' field and then press the End key on your PC. Then type the following into the field:
;C:\Program Files\Java\jdk1.8.0_25\bin\
Do not forget the semi-colon at the start - they are used to separate each path item from one another. The completed screen will look something like this:
Click 'OK', followed by another 'OK', and finally another 'OK'. Close the Control Panel window. To make the new environment variables effective, log out from the system, then log in again. Open a Command Prompt and type the following commands, one by one:
echo %JAVA_HOME%
echo %PATH%
You should see something similar to the screen below.
Strictly speaking, this settings is not necessary for Android program development but is recommended if you are new to Java and wish to learn Java programming which is a requirement for Android program development. The JAVA_HOME and PATH settings will help the new Java programmer to execute the 'javac' (the Java compiler) from anywhere in the system.
If you have downloaded the demos (and samples) and docs, now would be a good time to install them. First unzip the demos to a temporary directory - this will create a 'jdk 1.8.0_25' sub-directory in which there will be two more sub-directories - 'demo' and 'sample'. Then unzip the 'docs' file to the same 'jdk 1.8.0_25' sub-directory just created. This will create another sub-directory called 'docs'. Then move all these 3 sub-directories ('demo', 'docs' and 'samples') to the actual Java directory, i.e., 'C:\Program Files\Java\jdk1.8.0_25'. You will have to give permission for this action since you are moving files into a 'system' type directory.
Now it's time to download and install Google's Android Studio. Point your web browser to here and click on the big green button to start the download.
Then check the terms and conditions item and then click the download button. Save the file and wait for the download to finish.
Double-click on the downloaded file to install it - if UAC asks for permission, click on 'Yes'. The setup screen (see figure below) will appear - click on the 'Next' button.
Click on the 'Next' button when the next screen (shown below) appears.
The next screen (shown below) is the license agreement. If you agree to it, click on the 'I Agree' button.
The next screen (shown below) is the configuration settings where all the installation paths are shown. Change it if you wish and click the 'Next' button to proceed.
The next screen (shown below) is another configuration setting for the accelerated emulator mode using HAXM and for size of the emulator memory. The recommended size is already specified, so just click on the 'Next' button.
 |
| Add caption |
The next screen is for the creation of a start menu folder - leave it at the default and click on the 'Install' button. The actual installation of Android Studio will begin - wait for the installation to finish and the screen shown below will appear. Click on the 'Next' button.
The last screen (shown below) will be displayed with the 'Start Android Studio' checked. Click the 'Finish' button to close the setup window and start Android Studio.
The first screen (shown below) asks whether you want to import any settings. If this is the first time you installed and started Android Studio, chances are that you don't have any - so just click on the 'OK' button.

Android Studio will begin loading as shown in the figure below.
When it has finished loading, it will check for an Internet connection and then start to download the Android SDK Tools (see figure below).
When it has finished downloading and installing all components, a low window will appear (see figure below). Check this window for errors - if there are none, then click on the 'Finish' button. If there are errors, the log window will give details on the errors - you need to fix them before trying to use Android Studio for Android program development.
The main Android Studio IDE will then appear (see figure below). Notice that at the bottom of the windows is a message 'Check for updates now' - click on the 'Check' term to start the check.
If there are any updates, a window similar to the one below, will appear. Click on the 'Update and Restart' to start the update process and to restart Android Studio.
Once the updating process has finish, Android Studio will restart and you will be back to the IDE.
Congratulations! You have now sucessfully installed Android Studio on your Windows 8.1 PC. Where to go from here? You must know that Android Studio is relatively new (Google was using the Eclipse IDE previously) so the number of good tutorials on the web is somewhat limited. However, a quick search on Google revealed some good sites - I recommend that you visit some of the sites and see whether they meet your needs.
Happy computing!


0 comments:
Post a Comment